This article walks you through the process of adding and customizing an accessibility plugin to your WordPress site. This Accessibility plugin adds a toolbar to your site, offering more features and providing better access to a wide range of users.
The plugin introduces a customizable toolbar that offers options for users to modify settings according to their preferences.
Key Features:
- Font Resize: Users can adjust the font size by increasing or decreasing the text for better readability.

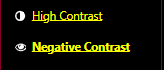
- Colour Contrast: Users can choose from grayscale, negative contrast, high contrast, or light background modes to improve the visual clarity of content on the site.
- High Contrast

- Negative Contrast
- Grayscale

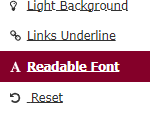
- Light Background

- Link Styling: Enable underlining for hyperlinks, making them more noticeable. When link underlining is enabled, all hyperlinks on the site will appear underlined, ensuring easy access to the sitemap, and other linked resources.

- Readable Fonts: This feature switches the font design present on site to more readable option for improved legibility and comprehension.
Additional Accessibility Enhancements:
- Skip to Content: Provide an option for users to bypass repetitive navigation elements and jump directly to the main content.
- Flexible Settings: You can adjust the plugin's features and appearance to meet your site's specific accessibility needs
- Focus Outlines: Automatically add focus outlines to interactive elements, helping users identify their location on the page.
- Link Adjustments: Standardize link behavior by removing target attributes, and enhancing navigation consistency.
- Landmark Roles: Add ARIA landmark roles to elements, facilitating smoother navigation for assistive technologies.
How to Enable and Customize the Plugin:
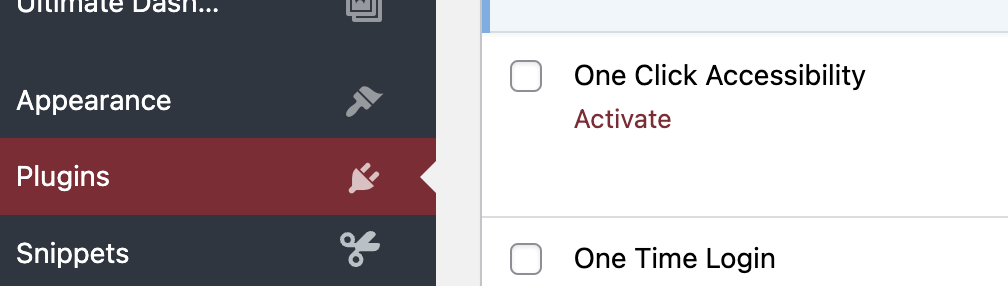
1. Navigate to your WordPress dashboard and select "Plugins". Click "Activate" under the "One Click Accessibility" plugin to activate and visit your site.
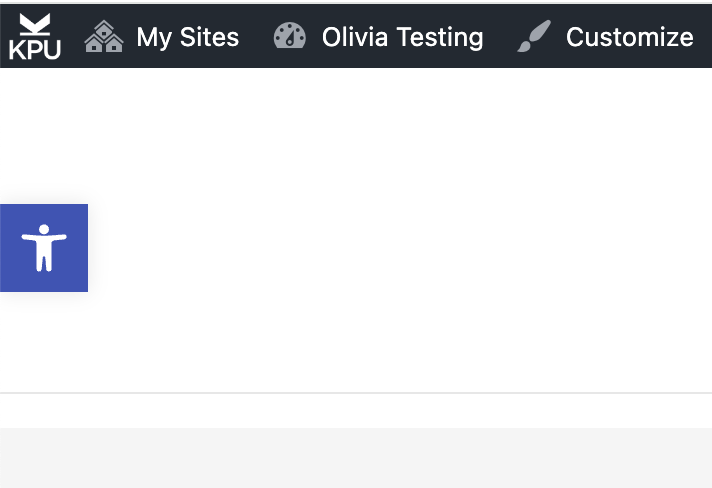
2. Visit your site. You will notice the accessibility icon positioned on the left side.
3. To customize the setting, click "Customize".
4. Select "Accessibility". Here, you can modify the icon, position, and colour to suit your preferences. Click "Publish" once you are finished with modifying the icon.


This work by Kwantlen Polytechnic University (KPU) is licensed under a Creative Commons Attribution-NonCommercial 4.0 International License.