This article provides an overview of key features of OneDrive, such as accessing, creating, and sharing a document among multiple users with different levels of permission, collaborating, and providing feedback using Office 365 Documents.
Please note that while the look and feel of your OneDrive may vary slightly, the process remains the same. For more information on OneDrive, please click here. Or use one of the documents below
A. Access OneDrive
Accessing OneDrive from the Browser
1. Signing into OneDrive
You can sign into OneDrive by clicking here once you have logged in with your KPU email, you will be placed on the Office 365 home page.
2. Accessing OneDrive
On the left-hand corner of the page, click on the app launcher button, which looks like a dotted square. This is also where you would access all of the Office 365 apps.

A new menu will appear that contains all of the applications available through Office 365. Click on OneDrive
You'll be in your OneDrive folder now.
3. Creating a Document
From OneDrive, you have the option to either create a new file or upload an existing file..
 | |
|---|---|
| You can choose from a whole suite of Office 365 resources or upload your own file. | |
 |  |
Accessing OneDrive From Your Computer
Please watch the video below or continue to the steps below to learn how to access OneDrive from your computer.
B. Sharing on OneDrive
Sharing from your browser
Once you have your file up and ready on OneDrive, it is ready to be shared with other users.
Sharing from OneDrive
1. Select the file
Find the file that you would like to share, hover your mouse over the left side of the file, and click the button.

2. Sharing the file
Scroll to the top of the page, you will see a menu appear click the share button

You will see a few options, you can either share the link by email or you can get a link with the copy link option
Sharing from the office 365 file
1. Click the share button.
On the top right of the file page, you will see a share button that will open a drop-down menu.

2. Selecting your preferred share option
You will see a few options, you can either share the link via email or you can get a link with the copy link option or if you are working in a PowerPoint presentation, a link to the slide that you are presently working on.

Sharing From Your Computer
Sharing your files from OneDrive can not only be done in your browser but on your computer as well.
1. Open OneDrive
From your desktop search for OneDrive

2. Sharing a File
from the file viewer page, right click the file that you would like to share and click the share button
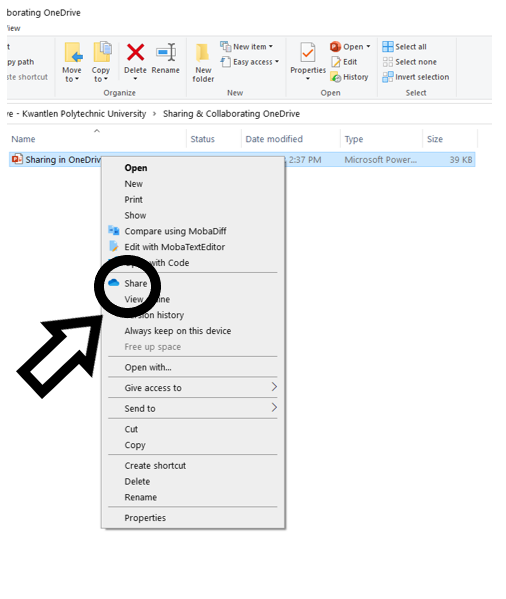
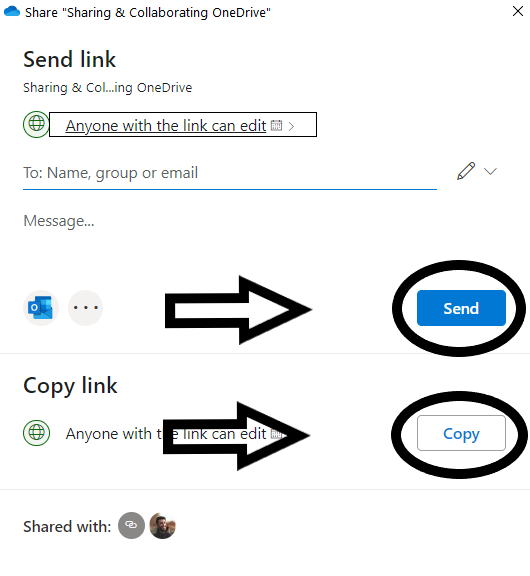
A new popup window will appear and it will give you the same options as the browser. You can either send a link by mail or copy the link and paste that to another user.

3. Sharing a Folder
OneDrive gives the user the same sharing capabilities with folders as well. If there are multiple files that you would like users to have access to, folders will be useful.
Right click on the folder that you would like to share. Typically your folder would look something like the one below.

Click on the share button

A new popup window will appear and it will give you the same options as the browser. You can either send a link by mail or copy the link and paste that to another user.
Sharing from a file within your computer
1. Click share the share button
If you are working on a file on your computer and you would like to share that file with them live you can do that by clicking the share button within your document. This can be found from the top right corner of your document.

A drop-down menu will open and you will be able to select whether to send by mail or copy a link to the file to send else where

C. Managing Permissions for Access
By default, the person you have shared your file/folder with, will have full permission to edit and view it. Here are some ways to make those changes.
Adjusting settings for the link
1. When the user clicks on the link below they will be able to adjust the share settings of their file.
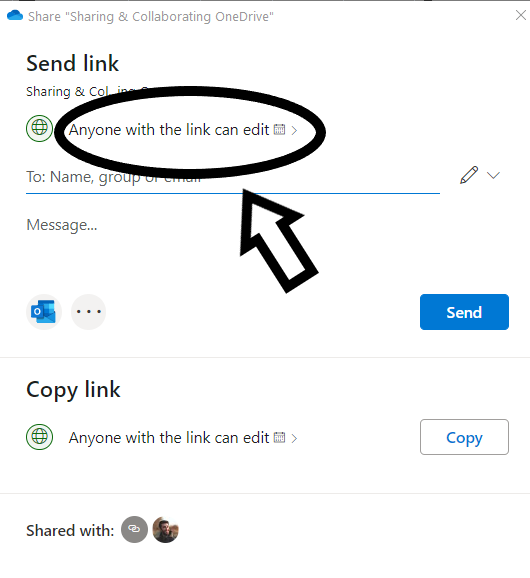
A new page will appear and from here you can make all the adjustments.

Here is a brief overview of what is available to the user:
| Anyone with a link | People within KPU with the link | People with existing access | specific people | |
|---|---|---|---|---|
Can edit/Can view | ✔ | ✔ | X | ✔ |
Expired Access | ✔ | X | X | X |
Set Password | ✔ | X | X | X |
Block download | ✔ | ✔ | X | ✔ |
D. Collaborating in OneDrive
When someone shares a file with you, the email you receive includes a link that opens the document in your web browser: in Word for the web. Select Edit Document > Edit in Browser.

Co-authoring
If anyone else is working on the document, you'll see their presence and the changes they're making. We call this coauthoring, or real-time collaboration.
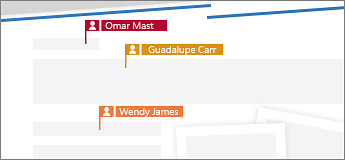
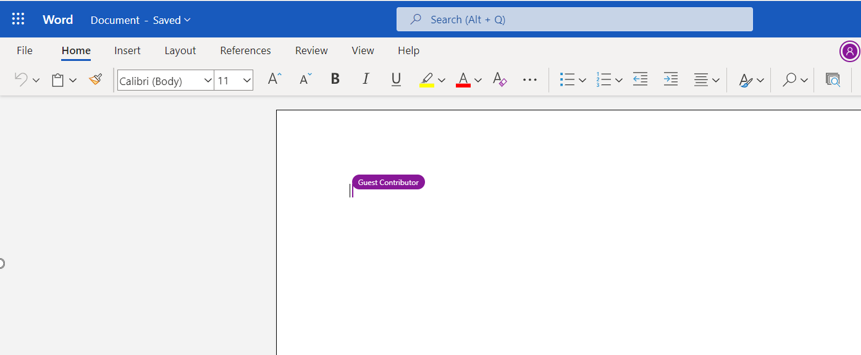
Guest Contributors vs identified
There are two types of users in OneDrive, Anonymous users or guest contributors and Identified users. Guest contributors are those who are not signed into a OneDrive account but have access to the document. Just a reminder the only way that a user can be an anonymous user is if they have access and are not logged into an account. Please refer to the chart above for the appropriate settings.
E. Giving Feedback in OneDrive
In all office 365 files, you will have the option to give feedback and review changes made. Please note that the look and feel might be slightly different depending on the what file you are looking at and if you are on your browser or computer. The process, however, does not change.
Commenting in OneDrive
Comments can easily be made in OneDrive as well.
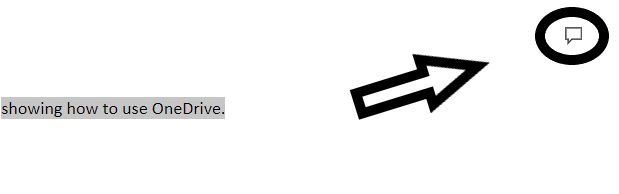
1. Select the area where you would like to make a comment.
This could be a set of text, or maybe the end of a paragraph.

2. Click New Comment or click the comment box on the right side of the page
 |  |
3. Submit your comment entry
a comment box will open and you will be able to make your comment

Tracking Changes and Markups
1. Click on Review
On the left side of your document you will see a tab with several options one of them is review click on that.

2. Click track changes
From here you can select what you would like to track. Track everyone's work or just your own even none at all.
 | 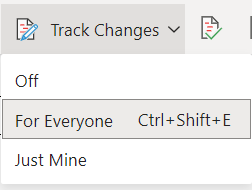 |
Now when a user makes a change to the document, the changes will be reflected with different a colour for each user


This work by Kwantlen Polytechnic University (KPU) is licensed under a Creative Commons Attribution-NonCommercial 4.0 International License.